
Customize your invoice settings
 If you go to Settings › Billing, you'll find billing settings on the left, and your invoice settings on the right. These options let you choose your net terms, how to bill jobs that cross rate-hours, picking your default sales tax, online payment options, etc. It also controls information you automatically show on invoices and line items.
Due-date, cross rates, and default tax
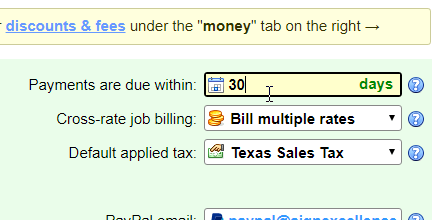 In the "Payments are due within" field, enter the number of days by which an invoice's payment is due (net terms). When you publish an invoice, its due date will be set to today plus this number of days. This number can be as low as one week, and as high as 60 days. This number of days is also used in the aging report (a financial report that shows past-due invoices, broken down by customer), and the "Unpaid" invoice search.
Default sales tax / VAT
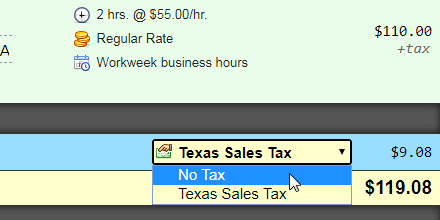 Terpsy supports multiple sales taxes and VAT: the "default sales tax" setting lets you optionally select a tax that will automatically be applied to invoices. Regardless of this choice, you can always pick, in the invoice itself, a different tax (or "no tax"). Also regardless of that setting, invoices generated for an organization you marked as tax-exempt will not include a tax. You can change the tax on an invoice after the fact.
Accepting online payments
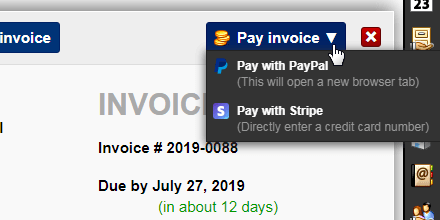 When customers view your invoices in their Account Manager, they will have the option to pay them online if you've set up payment processors in your settings.
To let them pay with PayPal, enter your PayPal email address in the "PayPal email" field. To let them pay your invoices directly by credit card, and you have a Stripe account, click on the "Configure Stripe..." button. When the popup opens, enter your "publishable key" and your "secret key" in both fields, and click "Save your keys." You will find both keys in the API Keys page of your Stripe dashboard.
Covering credit-card processing fees (or not)
 You can either absorb credit card fees with higher rates or explicitly charge a "convenience fee." In Terpsy, go to Settings › Billing: enter a percentage (e.g., "3.5") in the Convenience fee field. Click Save.
From there on, a notice will appear next to invoice balances, notifying clients that if they pay by credit card, they should pay the amount mentioned in that notice. (This notice is visible on invoices you print or email as PDF.) And clients who want to pay online will see a confirmation message informing them of the convenience fee and showing the updated balance to pay.
Billing holidays
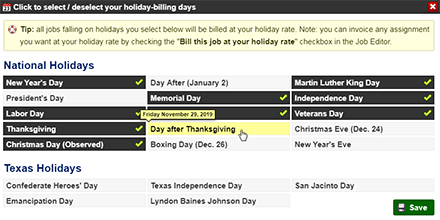 The "billing holidays" settings aren't related to when your agency is open or closed. The billing holidays you select tell Terpsy to bill jobs at your holiday rate on those dates. (You can set up an Account Manager notice if you need to tell customers about your upcoming unavailability or vacations.)
Click on the "Select holidays..." button to pick the federal and state holidays during which you want to apply a holiday rate, and click Save to apply. This will only affect unbilled and future jobs.
Invoice print settings
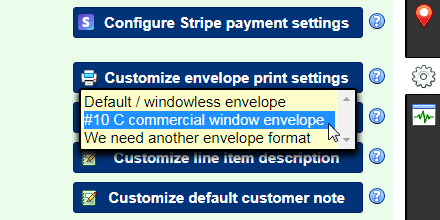 Invoices are printer-friendly: by default, they will use the same layout as what you see on screen. This efficient layout saves paper, and works fine if you fax invoices, or if you mail them in a closed (windowless) envelope. But if you mail them in a windowed envelope, click on the "Envelope settings" button. It will show a dropdown, which may look different by the time you read this. Select the windowed envelope you use from the dropdown, or click "We need another envelope format": if it's a standard format and we find the measurement info we need, we'll consider adding it to the list.
Default invoice content
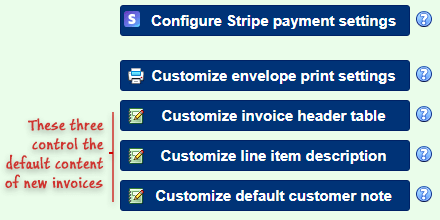 The last three settings (buttons) control the information Terpsy will add by default on new invoices and in each of their line items. These, along with your rates' "line item description," make billing near fully automated. In other words, taking the time to configure them properly from the start will save you much more time in the future.
Default invoice header table
 Click on the "Invoice headers" button to optionally add headers to the invoice: each column that isn't blank will automatically appear on invoices, pre-filled with any content you want. At invoice time, you'll be able to customize the text displayed in each of these columns. Notice that the text auto-completes based on each line you entered as possible value - but you can enter any text you want in those fields.
Automatic second line-item description
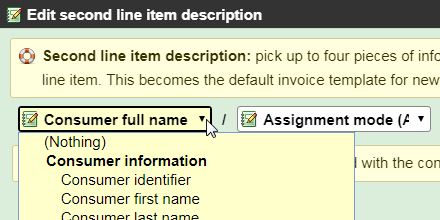 The first line item description comes from the rate (if you supplied one in the rate). The default second line item description comes from this setting: click on the "Default line items" button. You can pick up to four pieces of information from the assignment to automatically insert as description - like the consumer name or identifier, for example. You'll see That same setting when you edit an organization: you can have a global, default setting, but that you can override it on a customer-by-customer basis.
Default customer note
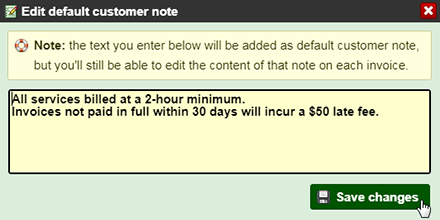 By default, the customer notes field at the bottom of invoices is blank: if you want to automatically display some information in that field, click on the "Customer note" button. Enter the default text you want to show, and click "Save changes." One agency mentions their minimum two-hour billing, and late fee policy. The default note will appear on all new invoices, but you can edit or remove its content.