
Using subaccounts
 By default, you create organizations and invoice them directly. Each organization has its own contacts, consumers, and locations. To limit redundancy, Terpsy lets you share these resources between related entities: different colleges in a university, departments in a company, etc. You do that by creating "subaccounts."
Creating a subaccount
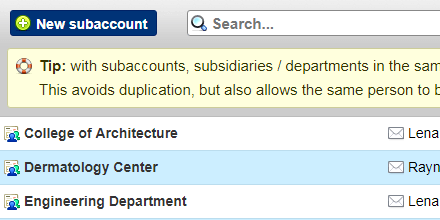
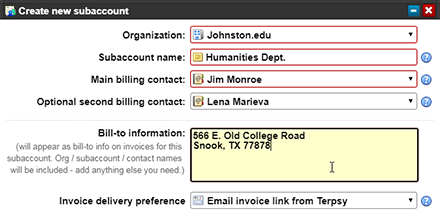 Go to the Subaccounts tab (this is not available in the mobile app), and click on the "New subaccount" button. Select the organization and type a subaccount name. Note: the subaccount name will be visible by customers in their Account Manager, and on any invoice you generate for that subaccount. Click Save to create it.
Billing contacts for subaccounts
 Each subaccount must have at least one billing contact: the person(s) you select will be able to view invoices for that subaccount when they log into their Account Manager. Interpreting agencies who work with colleges often have one contact that reviews / approves invoices, and another university staff in charge of paying the invoice. When you email an invoice, all billing contacts will be automatically included.
Associating jobs with subaccounts
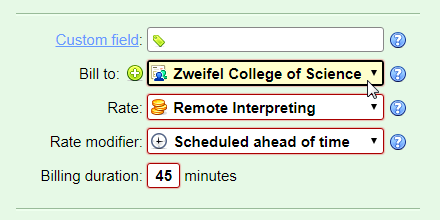 When customers schedule an interpreter from their Account Manager, they can select the subaccount to which that assignment should be billed. When agency staff creates a job, they can also select a subaccount in the billing section. You can change that until the job is invoiced. By default, jobs are billed to "Main Office" - in other words, billed to the organization itself as opposed to invoicing a specific subaccount.
Segregating jobs by subaccount
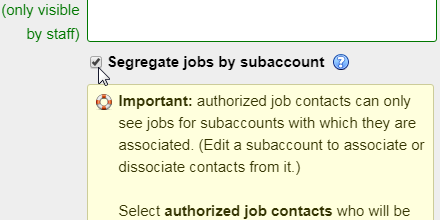 You read above how only billing contacts for a particular subaccount are able to view invoices for that particular subaccount. By default, the Account Manager shows all jobs to anyone who belongs to that organization. It makes sense intuitively, but some customers in the education and medical industries have very strict legal and privacy requirements. For those organizations, check the "Segregate jobs by subaccount" checkbox in their profile: as soon as you do, a list of "authorized job contacts" will appear. Select all the ones who are allowed to view assignments scheduled for the organization itself. Then, Save the change.
Selecting job contacts for each subaccount
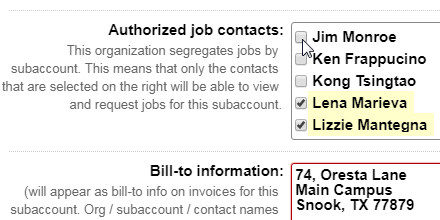 If you set an organization to segregate jobs by subaccount, don't forget to edit each of its subaccounts to determine who can view jobs scheduled for that subaccount. Note that a subaccount's billing contacts will always be able to see jobs for all their subaccount(s), even if you didn't explicitly select them as "authorized job contacts."